> ## Documentation Index
> Fetch the complete documentation index at: https://guide.codepure.com/llms.txt
> Use this file to discover all available pages before exploring further.
# How to Use it
> Set up Codepure in just a few steps.
# Quickstart
Follow these steps to quickly set up and use Codepure:
***
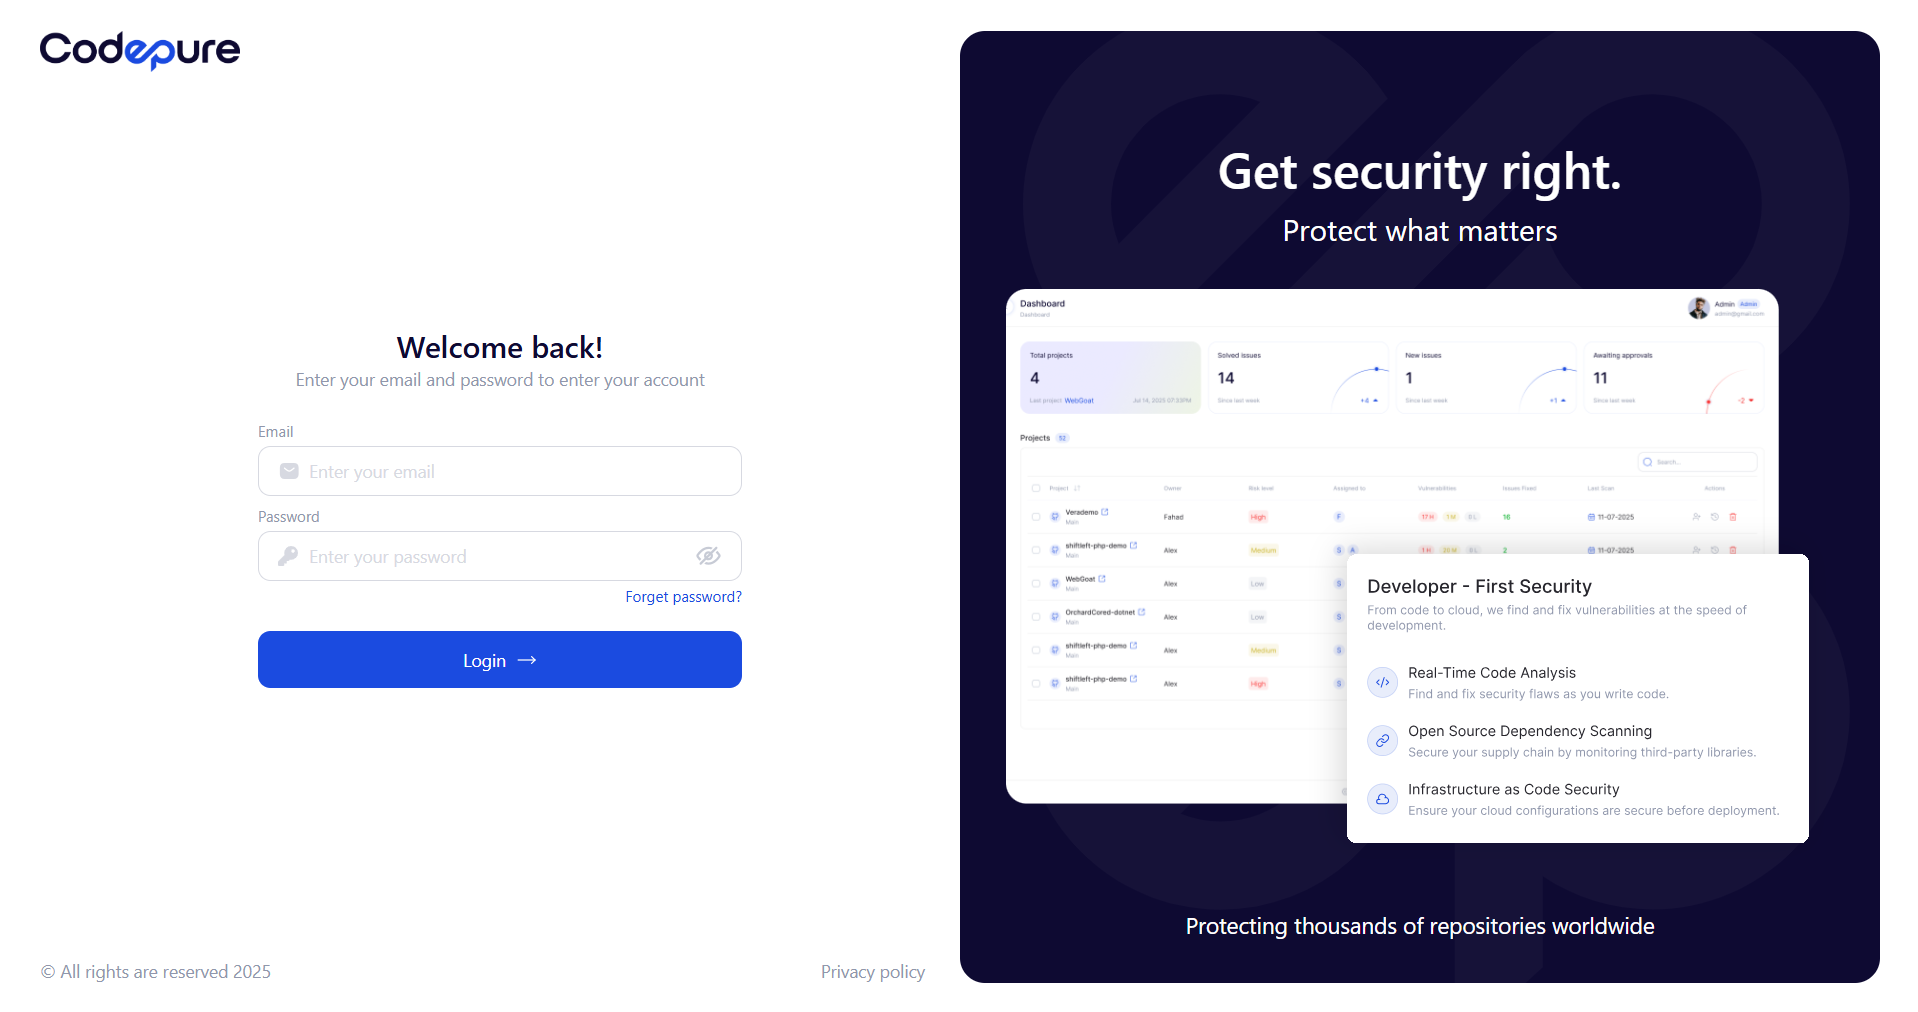
## 1. Login
Login to your account to access your dashboard.
 ***
## 2. Team Management
Manage who can access your dashboard and what they can do.
* From the side menu, click "Members".
* Click "Add User".
* Enter the user’s name and email.
* Choose a role: (Admin - AppSec - Developer).
* Set password.
* Click "Save".
***
## 2. Team Management
Manage who can access your dashboard and what they can do.
* From the side menu, click "Members".
* Click "Add User".
* Enter the user’s name and email.
* Choose a role: (Admin - AppSec - Developer).
* Set password.
* Click "Save".
 ***
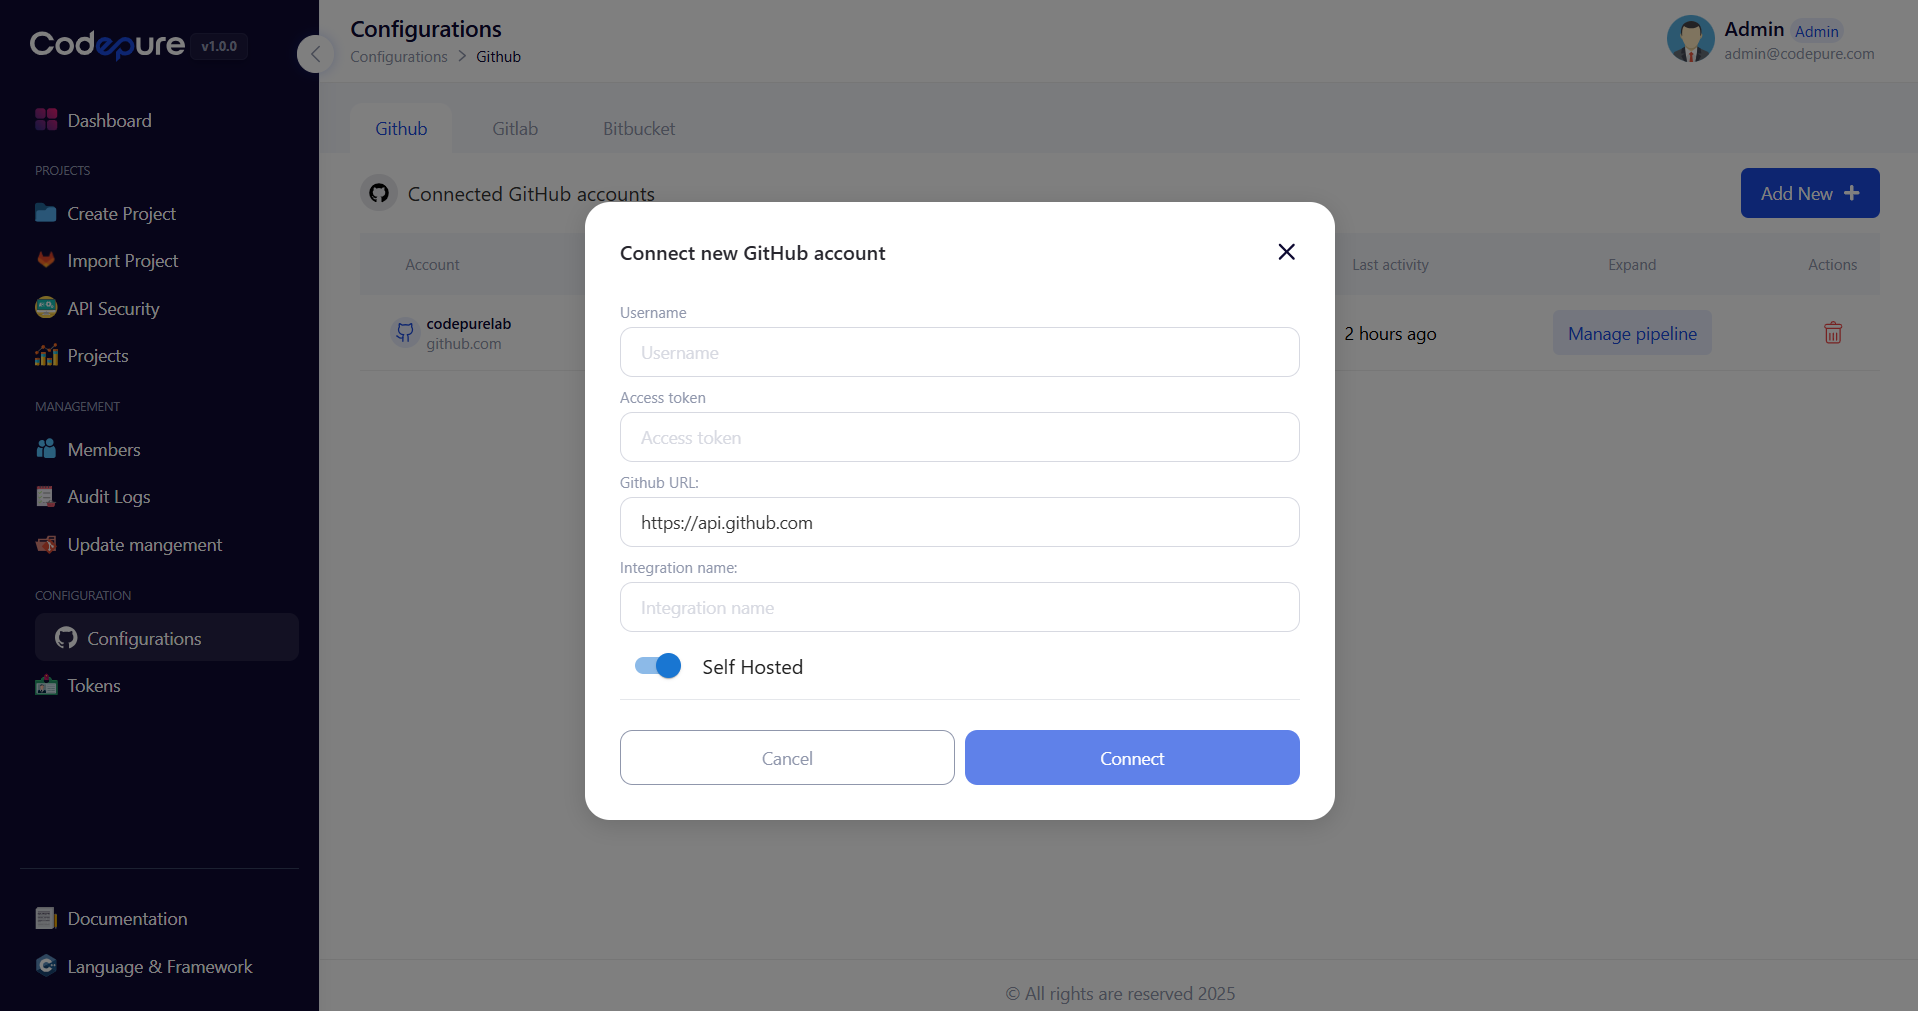
## 3. Configure Integrations
You need to connect your account with GitHub, GitLab, or Bitbucket before you can import your projects.
* In the side menu, click "Source Control".
* Choose the service you want to connect: GitHub, GitLab, or Bitbucket. Then click "Add New +".
* Enter the Configuration Info.
* Click "Connect".
***
## 3. Configure Integrations
You need to connect your account with GitHub, GitLab, or Bitbucket before you can import your projects.
* In the side menu, click "Source Control".
* Choose the service you want to connect: GitHub, GitLab, or Bitbucket. Then click "Add New +".
* Enter the Configuration Info.
* Click "Connect".
 ***
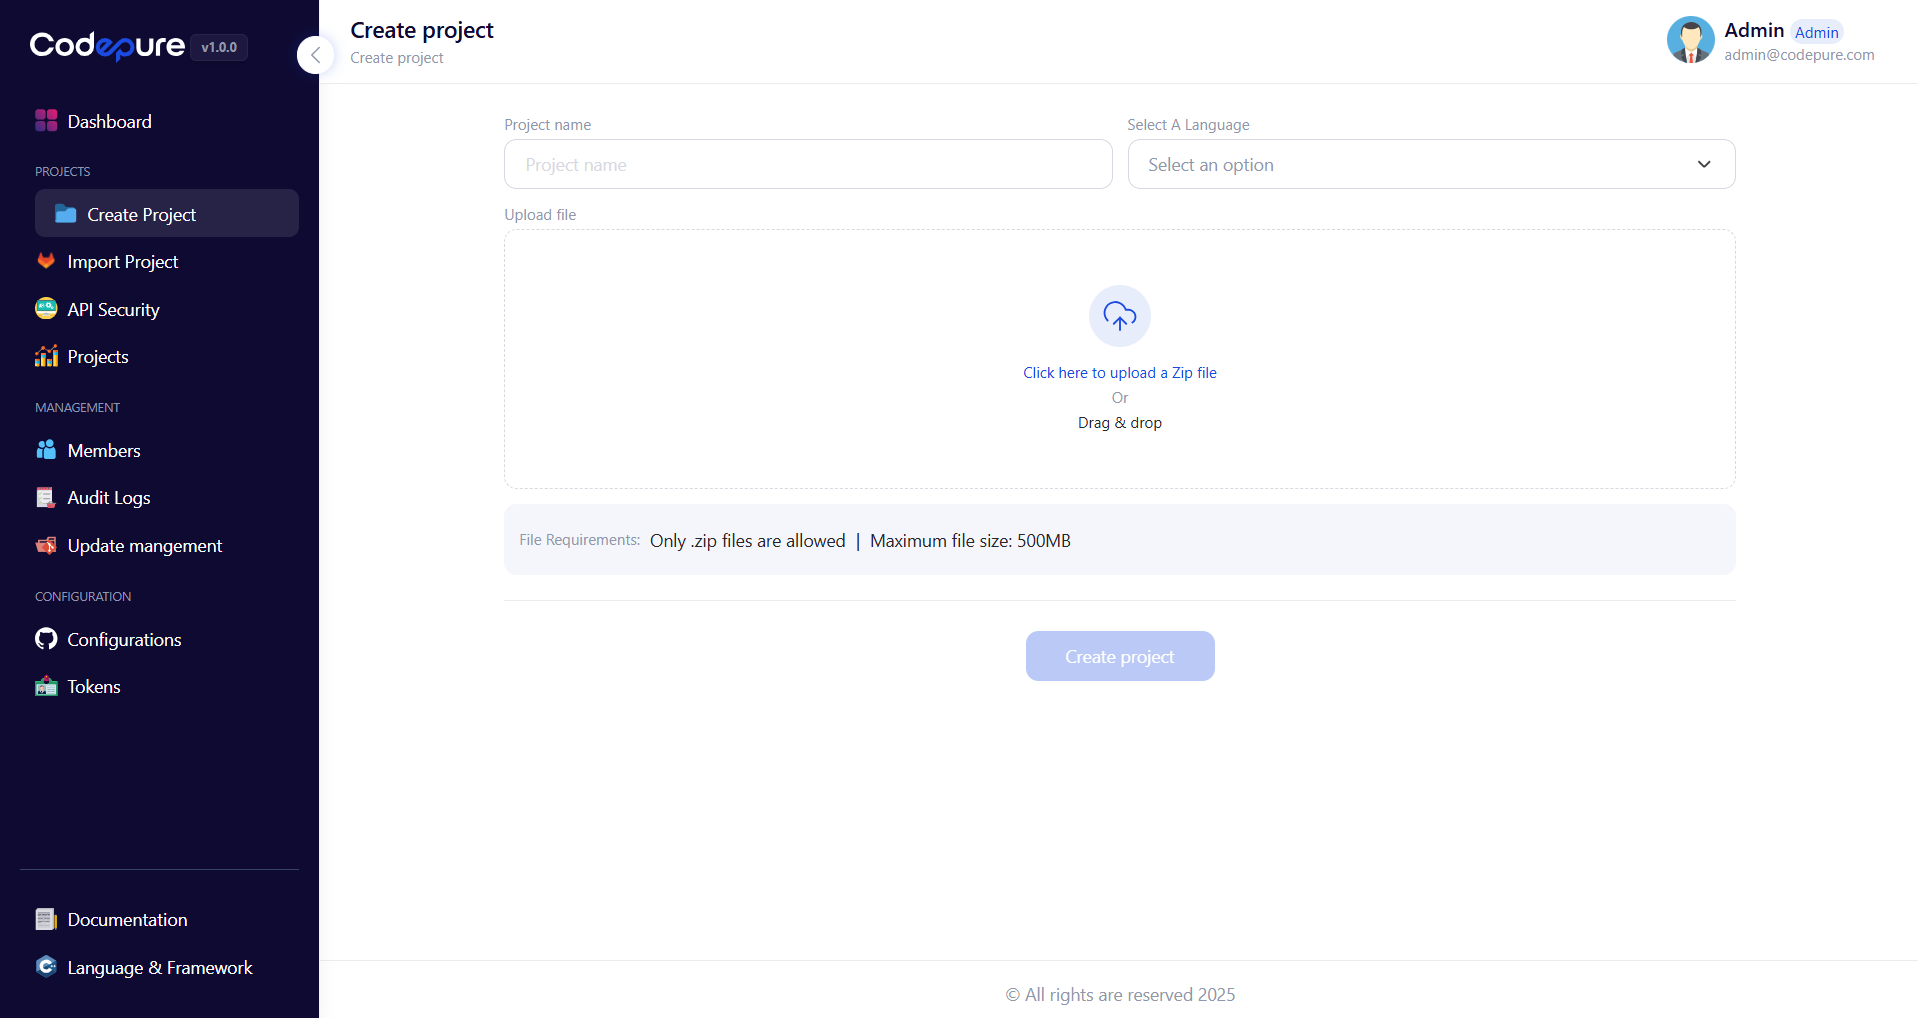
## 4. Create a Project
Add your project so you can scan it.
### Option 1: Manual Upload
Create a project manually by uploading your .zip project's file.
* Go to Projects → Create Project.
* Enter the project name and select project language.
* Upload project files.
* Click "Create Project".
***
## 4. Create a Project
Add your project so you can scan it.
### Option 1: Manual Upload
Create a project manually by uploading your .zip project's file.
* Go to Projects → Create Project.
* Enter the project name and select project language.
* Upload project files.
* Click "Create Project".
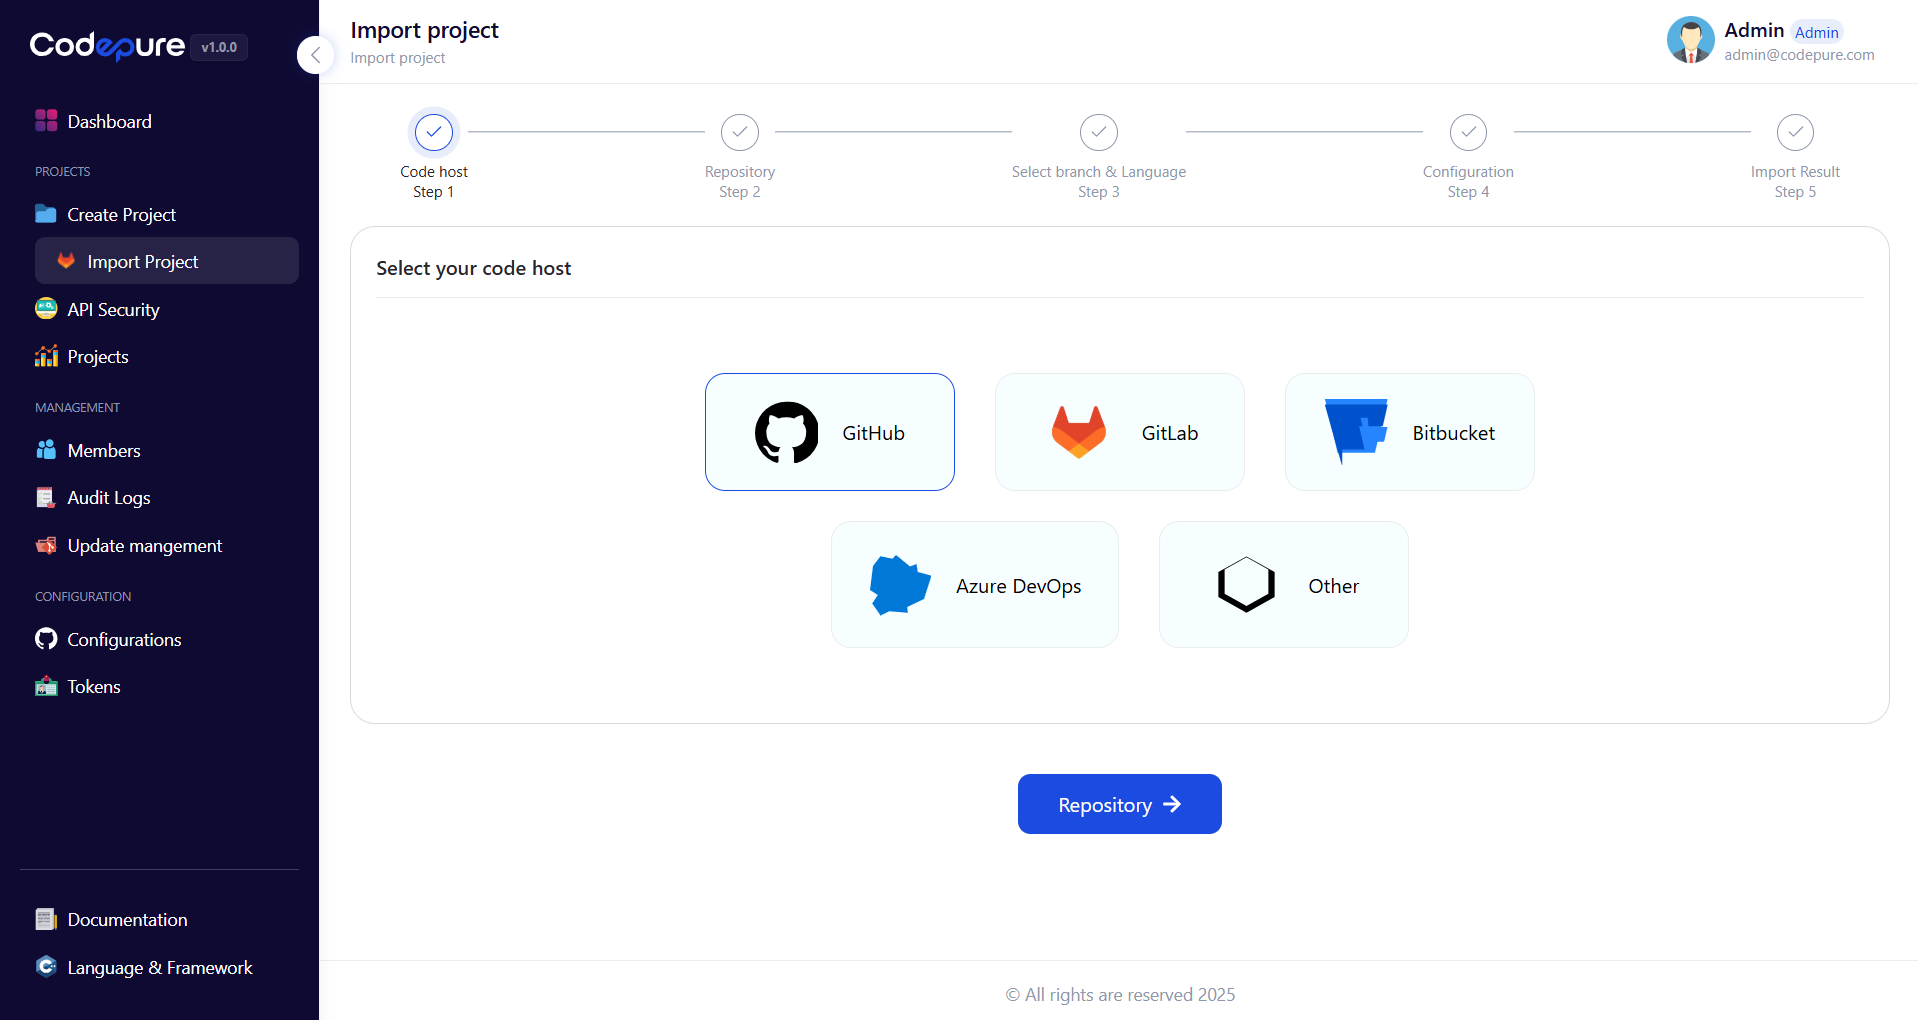
 ### Option 2: Repository Integration
Import your project directly from GitHub, GitLab, or Bitbucket. (You must configure integrations first — see Configure Integrations)
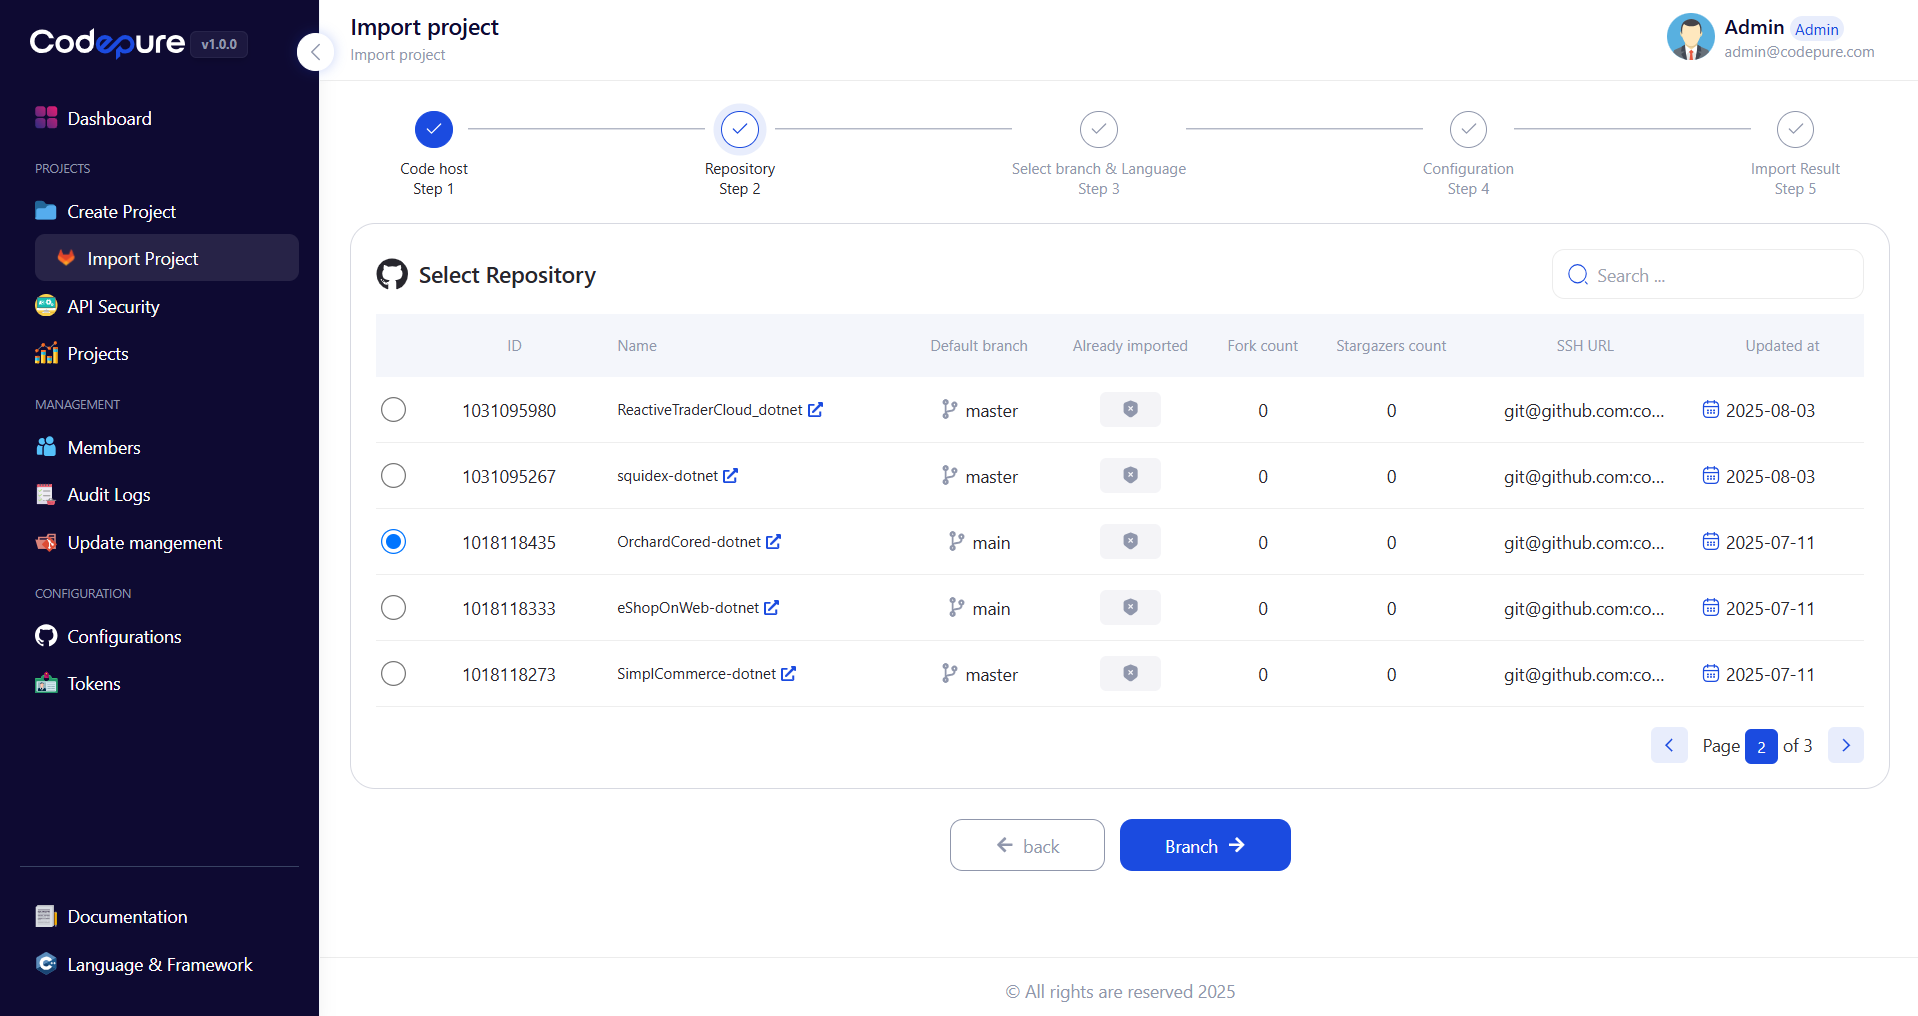
* Go to Projects → Import Project.
* Choose your code host: GitHub, GitLab, or Bitbucket.
* Choose the project which you want to import.
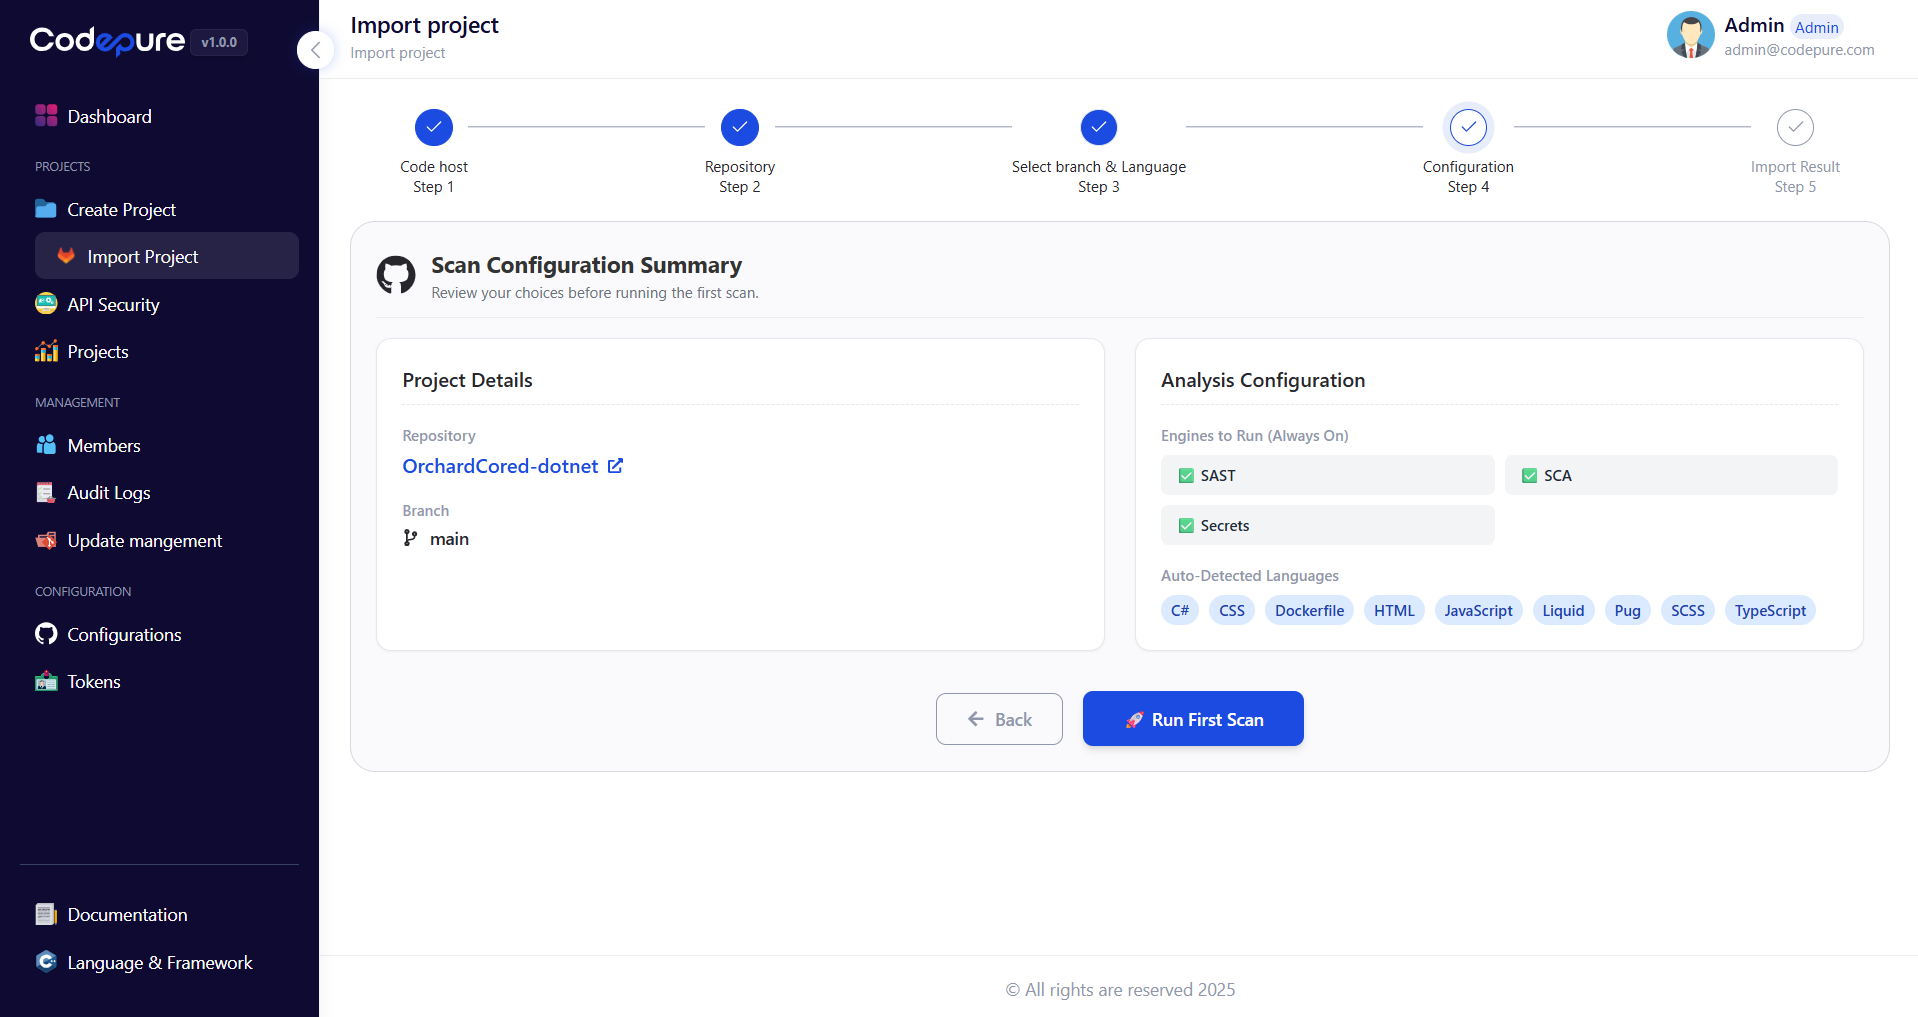
* Select project language and branch.
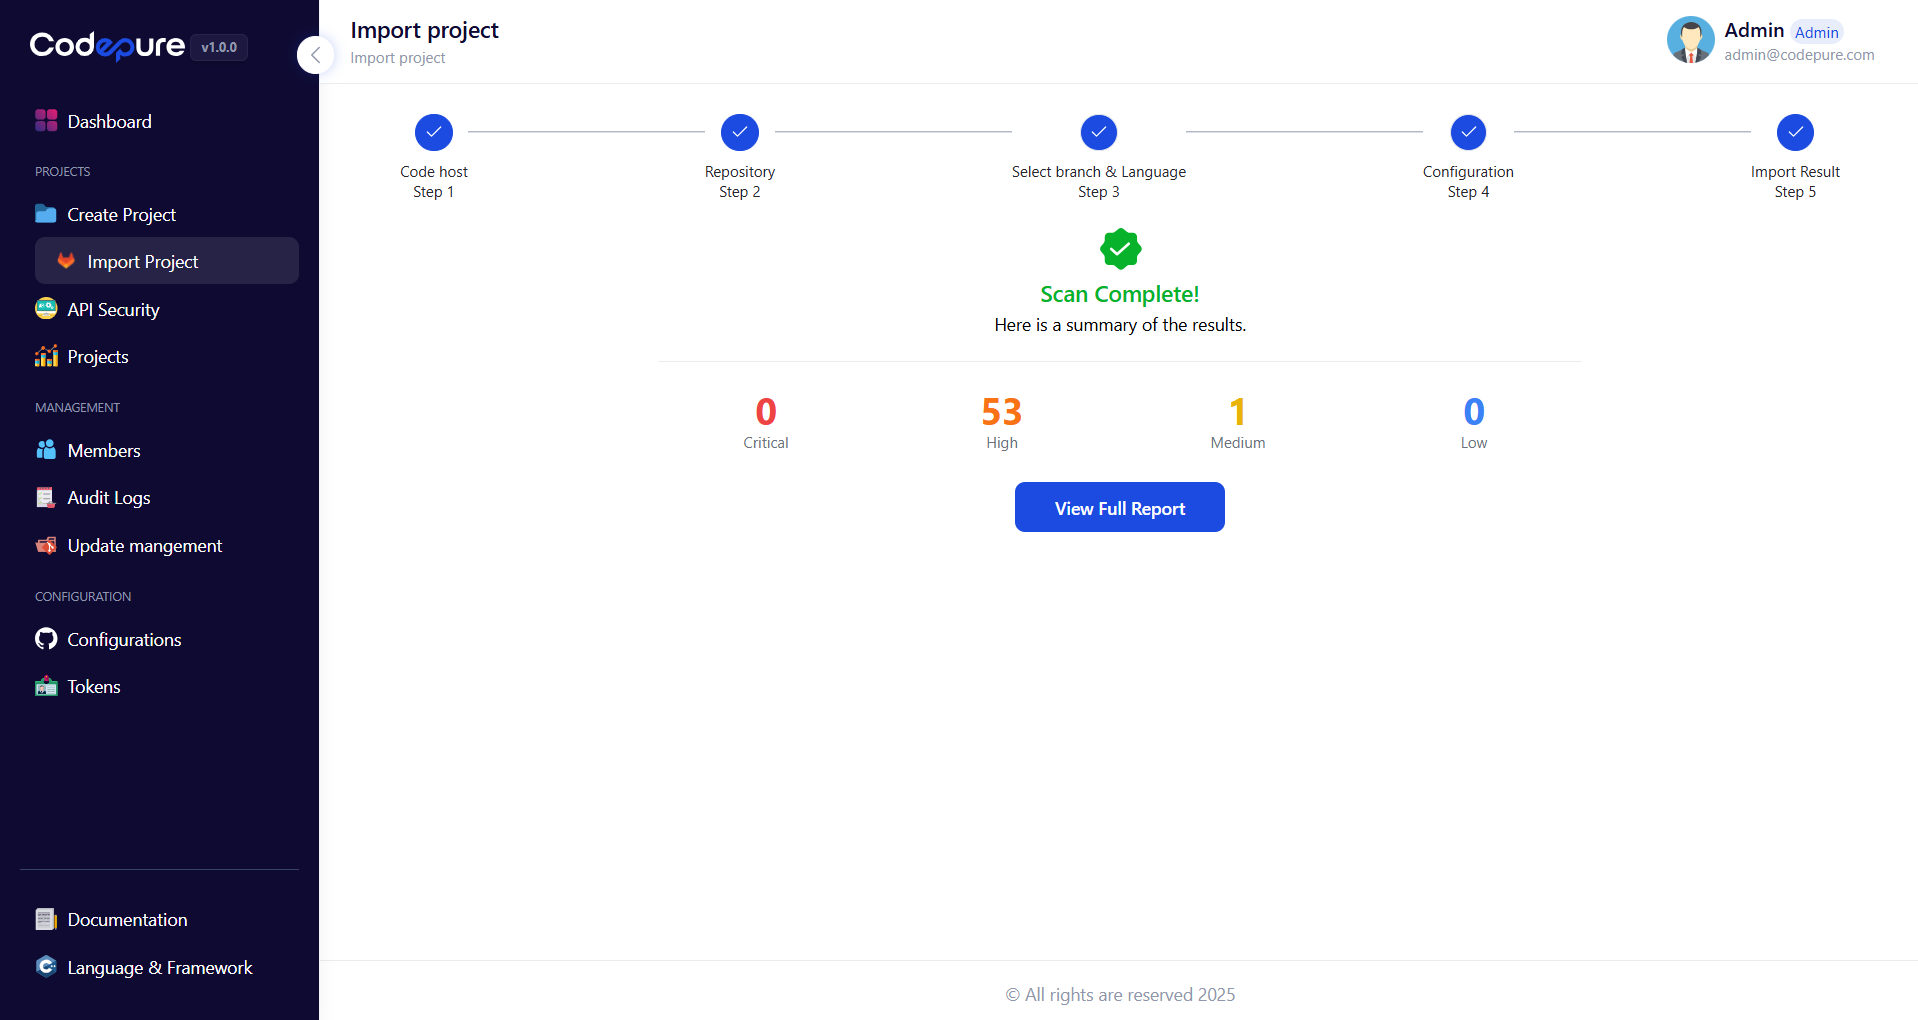
* Click "Run First Scan".
* Now you can click "View Full Report" to see the full results.
### Option 2: Repository Integration
Import your project directly from GitHub, GitLab, or Bitbucket. (You must configure integrations first — see Configure Integrations)
* Go to Projects → Import Project.
* Choose your code host: GitHub, GitLab, or Bitbucket.
* Choose the project which you want to import.
* Select project language and branch.
* Click "Run First Scan".
* Now you can click "View Full Report" to see the full results.

 ***
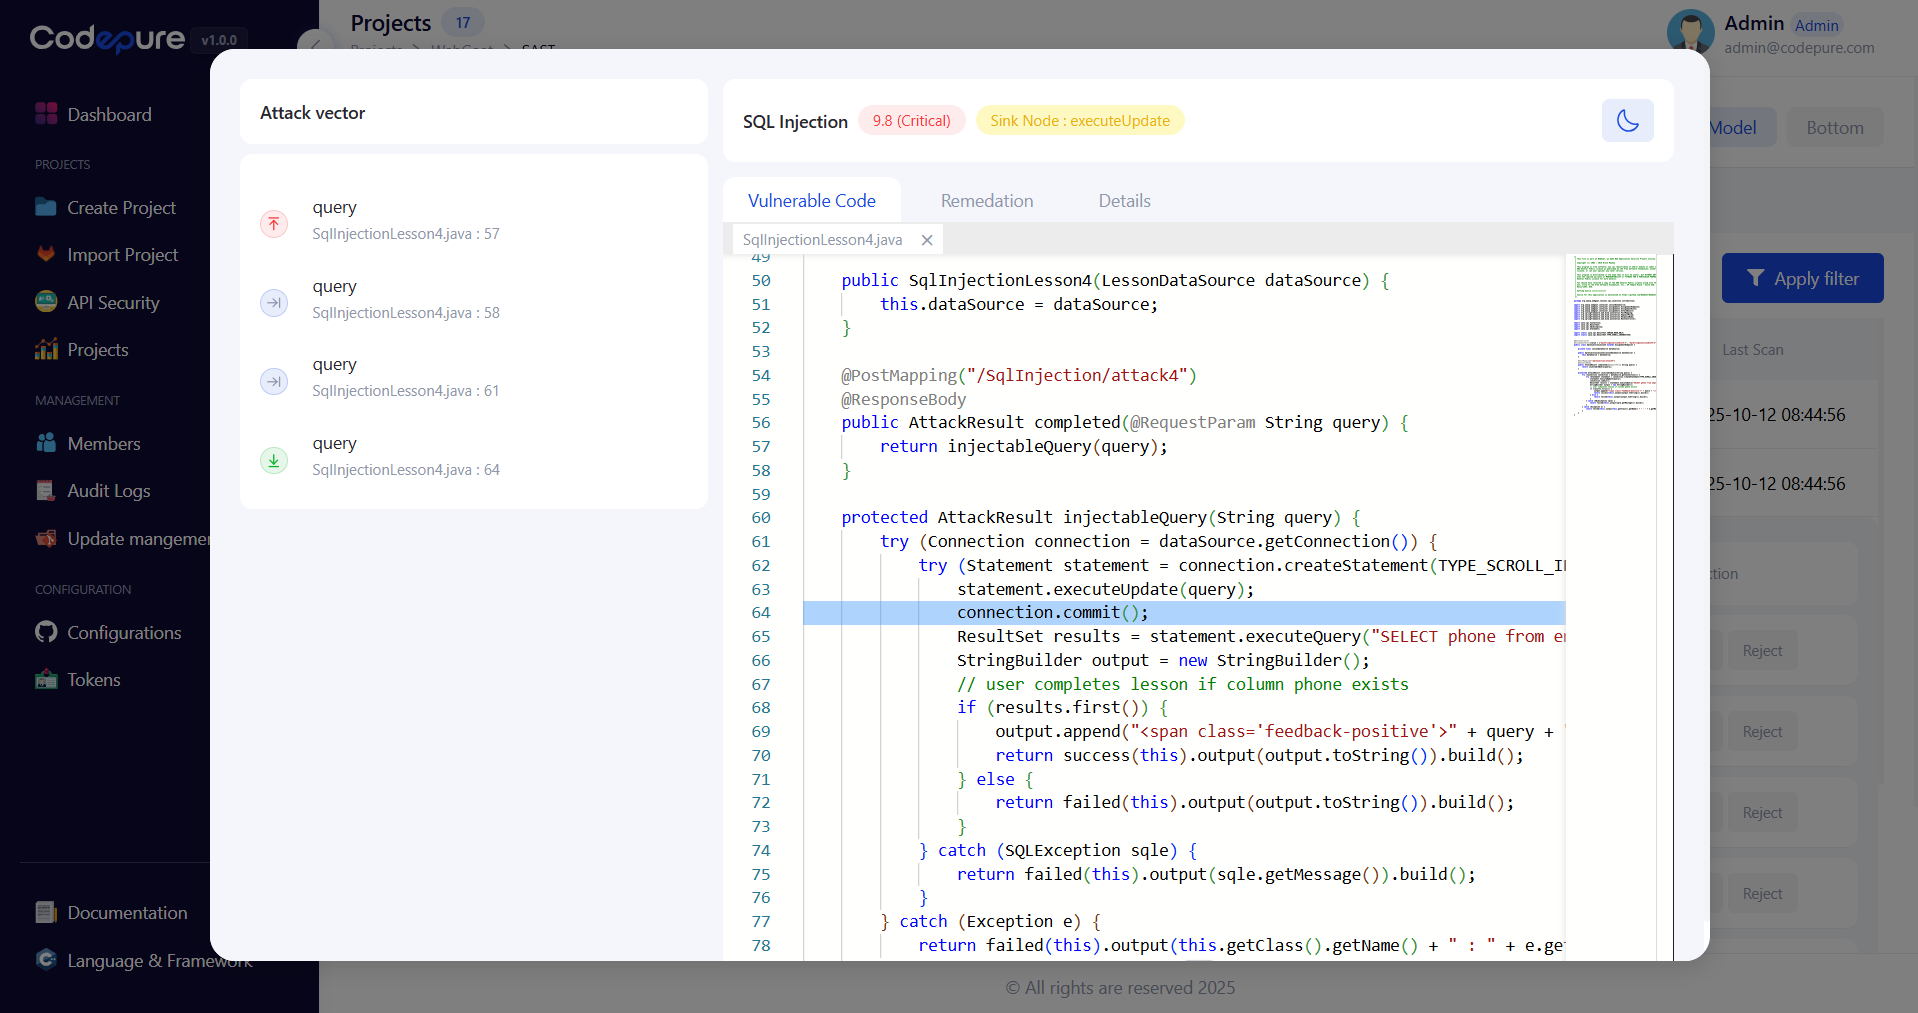
## 5. Review Findings and Fixes
Codepure provides detailed information about each issue, including the vulnerability type, affected code, and proposed fixes. Use this information to better understand and resolve security issues.
***
## 5. Review Findings and Fixes
Codepure provides detailed information about each issue, including the vulnerability type, affected code, and proposed fixes. Use this information to better understand and resolve security issues.
 ***
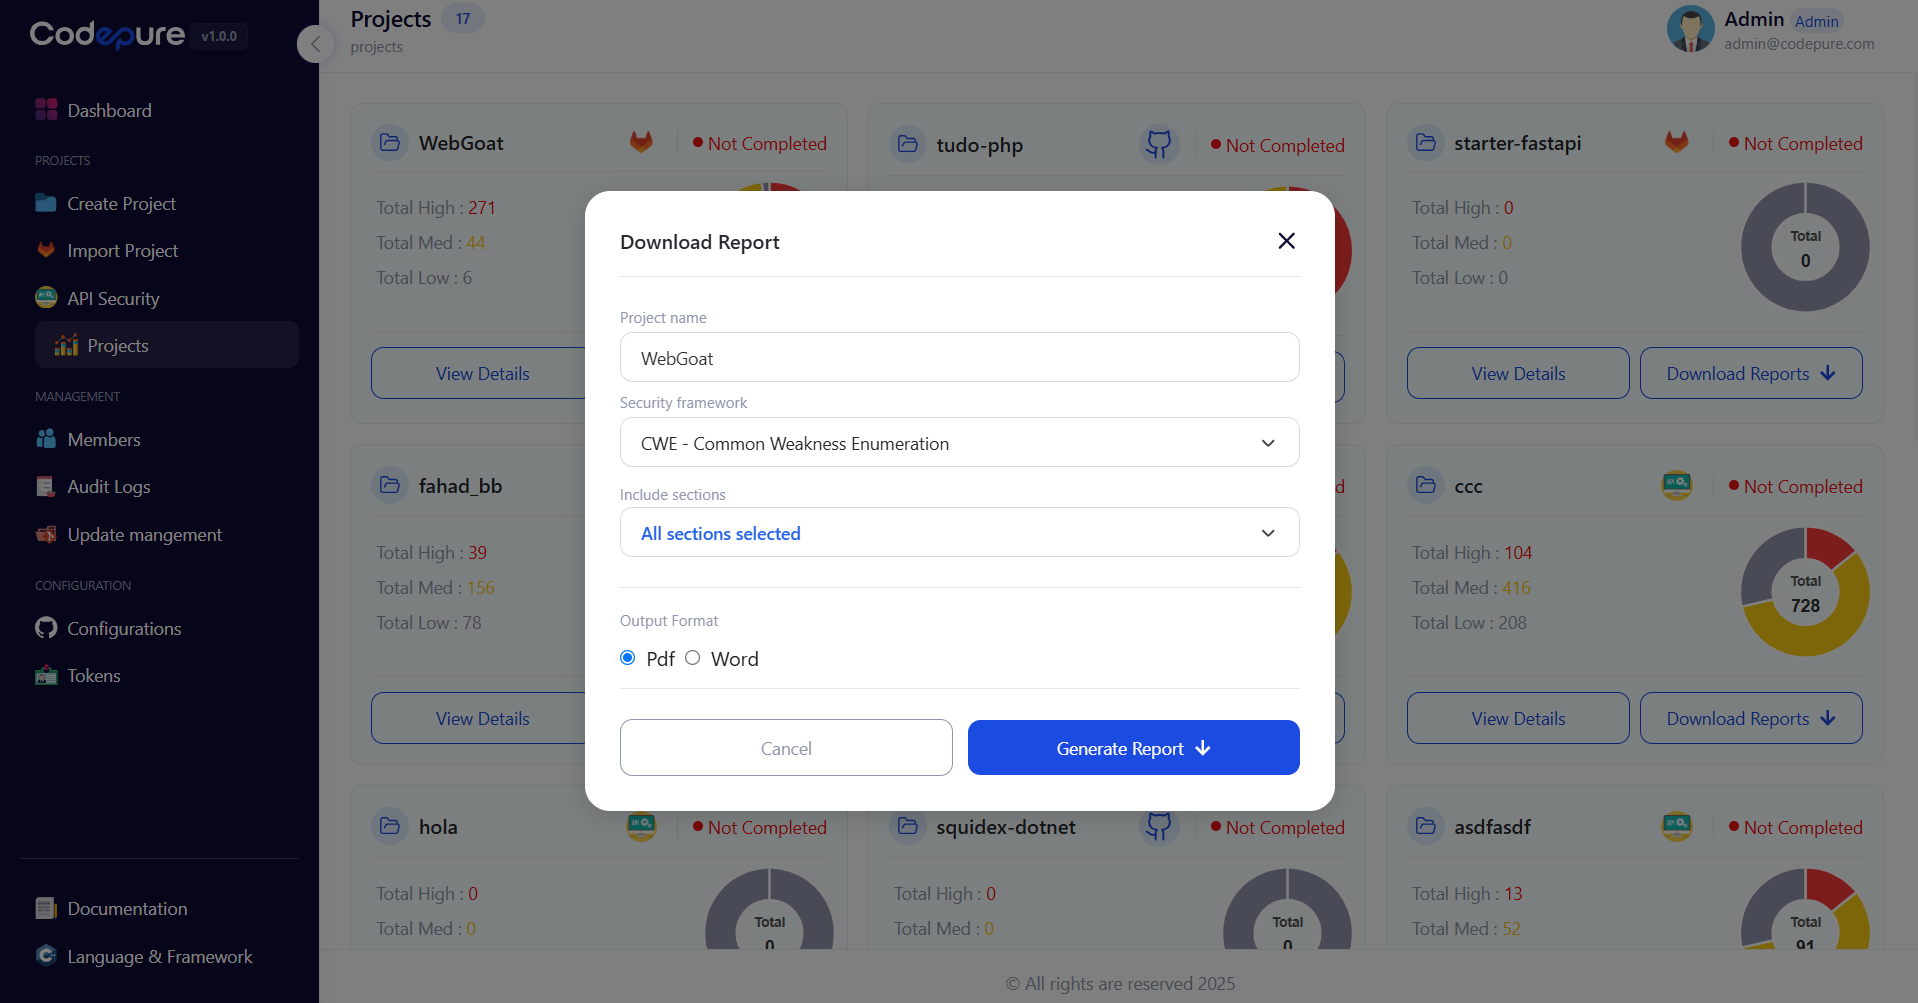
## 6. Generate Reports
Create detailed reports of scan results.
* Open Projects from side menu.
* Choose the project for which you want to generate a report and click "Download Report".
* Select your preferred security framework.
* Select report format (PDF, WORD).
* Click "Generate Report".
***
## 6. Generate Reports
Create detailed reports of scan results.
* Open Projects from side menu.
* Choose the project for which you want to generate a report and click "Download Report".
* Select your preferred security framework.
* Select report format (PDF, WORD).
* Click "Generate Report".
 ***
By following this process, you can integrate Codepure into your development workflow, ensuring secure code and streamlined remediation of vulnerabilities.
***
By following this process, you can integrate Codepure into your development workflow, ensuring secure code and streamlined remediation of vulnerabilities.